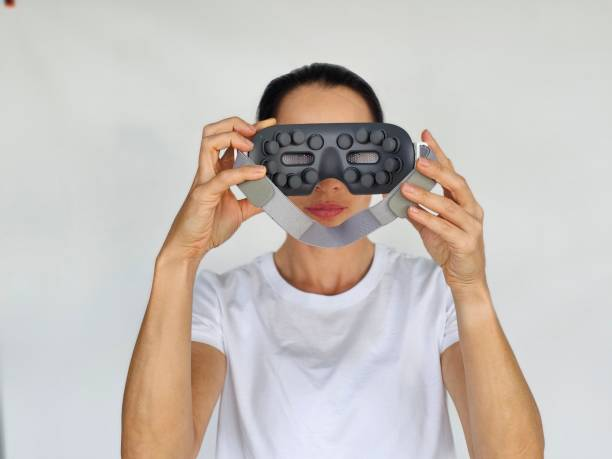
An LED eye massager is a wonderful tool for alleviating eye strain, reducing puffiness, and promoting relaxation. If you have recently purchased one or are considering adding it to your self-care routine, this guide will help you understand how to use it effectively.
Here’s a step-by-step guide to getting the most out of your LED eye massager.
Step 1: Understanding Your LED Eye Massager
Before you start using your LED eye massager, take some time to familiarize yourself with its features. Most LED eye massagers come with various modes and settings designed to cater to different needs. Read the user manual to understand what each button does and how to operate the device safely.
Step 2: Prepare Your Eyes
For the best results, make sure your eyes and surrounding area are clean. Remove any makeup or skincare products that might interfere with the device’s performance. You can gently cleanse your face with a mild cleanser and pat dry before using the massager.
Step 3: Find a Comfortable Position
Find a comfortable and quiet place where you can relax while using your LED eye massager. Whether you choose to sit or lie down, make sure you’re in a position that allows you to fully enjoy the experience without any distractions.
Step 4: Turn On the Device
Power on the LED eye massager by pressing the power button. Most devices will start in the default mode, which is usually a gentle massage with LED light therapy. You can adjust the settings based on your preference.
Step 5: Select the Desired Mode
LED eye massagers often come with multiple modes, such as heat therapy, vibration, and different LED light settings. Choose the mode that best suits your needs. For instance, if you’re looking to reduce puffiness, the cool mode might be ideal, while the heat mode is perfect for relaxation.
Step 6: Adjust the Intensity
Most LED eye massagers allow you to adjust the intensity of the massage and LED light. Start with a lower intensity if you’re new to using the device, and gradually increase it as you get more comfortable. Always listen to your body and adjust the settings to what feels best for you.
Step 7: Position the Massager
Place the massager over your eyes, ensuring that it fits snugly and comfortably. Make sure the LED lights are aligned with your eyes for optimal benefits. Some devices come with adjustable straps to help secure the massager in place.
Step 8: Relax and Enjoy
Close your eyes and let the LED eye massager work its magic. The gentle massage, combined with the benefits of LED light therapy, will help to soothe and relax your eyes. Use the massager for the recommended duration, usually around 15-20 minutes per session.
Step 9: Turn Off and Clean
Once your session is complete, turn off the device and carefully remove it. It’s important to keep your LED eye massager clean for hygiene purposes. Use a soft, damp cloth to gently wipe the surface and remove any residue. Avoid using harsh chemicals or submerging the device in water.
Step 10: Store Properly
Store your LED eye massager in a safe place where it won’t get damaged. Many devices come with a storage pouch or case, which is ideal for keeping it clean and protected.
Additional Tips
- Consistency: For best results, use your LED eye massager regularly. Consistent use can help to maintain eye health and reduce symptoms of eye strain.
- Hydrate: Drinking plenty of water can enhance the effects of the massage and keep your skin hydrated.
- Follow Instructions: Always follow the manufacturer’s instructions and guidelines to ensure safe and effective use.
Conclusion
An LED eye massager is a great addition to your self-care routine, offering numerous benefits for your eye health and overall relaxation. By following this step-by-step guide, you can make the most out of your LED eye massager and enjoy the soothing and rejuvenating effects it provides. Remember to use it consistently and take care of the device to prolong its lifespan and effectiveness.

